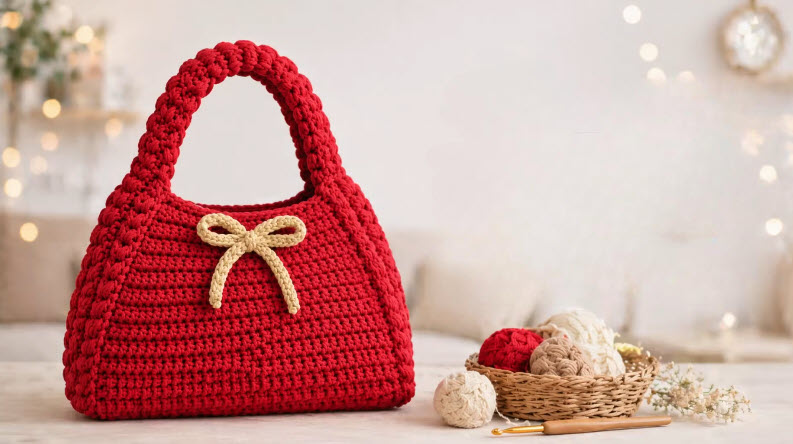
Some Crochet Red Bow Handbag projects are practical. Others are beautiful. There are also the special designs that stop people in their tracks, and make them smile and say, “Where did you get that? That’s a handbag with a really big red bow, and it’s a handmade handbag. It’s fun and fun-loving, but not childish, elegant and not too complicated, and it’s enough to make anyone’s outfit hop and skip, if you carry it.
Picture a project that not only features your important things but is the highlight of your style. The large ribbon bow makes this handbag look in style, and the crochet material adds a cozy texture which no manufactured accessory will provide. Its versatility makes it the ideal finishing touch whether you’re heading to a weekend market, meeting up with friends for a cup of coffee or simply strolling through the day outside, this bag is sure to make you look the part. Crochet red bow handbag pattern keeps winning everyone’s hearts.
The best part of making a crochet handbag by yourself is that you will know that you’ve been creative with every single stitch you crochet. Whether you choose the yarn color or adjust the size, or you add decorative elements – each finished bag is truly one of a kind. If that’s not the case, this project is fun enough that you will likely want to crochet several.
Step By Step: How to Crochet Red Bow Handbag Pattern
Now the fun part! The first section will be the body panels, then the sides, handles, and lastly the gorgeous ribbon bow that adds a touch of style to this handbag. Be patient and have fun creating a trendy accessory, one row at a time!

Why You’ll Love This Pattern
Beautiful crochet accessories don’t require any great amount of difficulty. This handbag has all of the things crocheters like:
- Beginner-friendly construction
- Elegant ribbon accent
- Practical everyday size
- Minimal shaping
- Easy customization
- Comfortable to carry
- Timeless design
- Quick weekend project
This bow bag design is perfect for those who want a modern look with a touch of the old-fashioned charm of handmade.
Skill Level
The difficulty level of this activity is beginner to intermediate. There are very few basic crochet skills you will learn:
- Chain stitch
- Single crochet
- Half double crochet
- Double crochet
- Slip stitch
- Working in rows
- Basic sewing
This project is suitable for anyone who knows how to do basic crochet stitches.
Materials You’ll Need
Compile a list of materials before you start.
Yarn
- Red, bright cotton yarn
- Matching ribbon (optional)
- Decorative Lining Fabric (Optional)
Tools
Crochet hook suitable for your yarn
- Stitch markers
- Yarn needle
- Sharp scissors
- Measuring tape
Optional:
- Magnetic clasp
- Decorative button
- Fabric glue
- Purse handles
- Metal rings
Cotton yarn gives very good stitch definition and also aids the handbag to keep its shape.
Finished Size
The final handbag has a dimension of about:
- Width: 10–12 inches
- Height: 8–9 inches
- Strap length: It is adjustable according to your preference.
It’s just the right size to take your daily necessities without taking up too much space.
Pattern Notes
So here are some tips that you should have on hand while crocheting:
- Maintain even stitch tension.
- Count stitches regularly.
- Prevent pieces from falling out of blocks before they are assembled.
- Sew seams carefully.
- Securely weave yarn tails.
- Measure the length of the strap before use.
With the careful finishing, you will have a well-finished handbag that you’ll enjoy having for years.
Step 1: Crochet the Front Panel
Start by chaining sufficient stitches to make your handbag width. Make rows of single or half double crochet stitches. Repeat until the panel is at a desired height. Ensure the edges are even and the stitching is even.
Step 2: Crochet the Back Panel
Do the same steps as with the front panel. Be sure to count the number of rows so that both panels align exactly. Matching panels will facilitate the ease of assembly later.

Step 3: Crochet the Side Gussets
For the sides of the handbag make 2 narrow strips. These pieces are used to measure the capacity of the bag. Make sure to work evenly and check the measurements against the front panel. A balanced gusset makes for a great and durable purse that will fit comfortably once packed.
Step 4: Crochet the Bottom Panel
It is very important to have the bottom to support the weight of the entire handbag. Crochet a rectangle that is the same width as the front panel. When stitching to be extra strong, use tight stitches. A solid base is essential for the shape of the handbag when it’s used every day.

Step 5: Assemble the Bag
Use a yarn needle to sew the front, back, sides and bottoms together. Take time to straighten all edges. The cleanest look is achieved by invisible whip stitches. This stage would take separate crochet pieces and make them into a functional handbag.
Step 6: Crochet the Handles
Use rows of tight stitches to make two strong handles. Short handles can be fashioned to tie into a hand bag or long handles for shoulder carrying. Measure length of bag before permanently attaching. Appearance is not the only consideration of comfort.
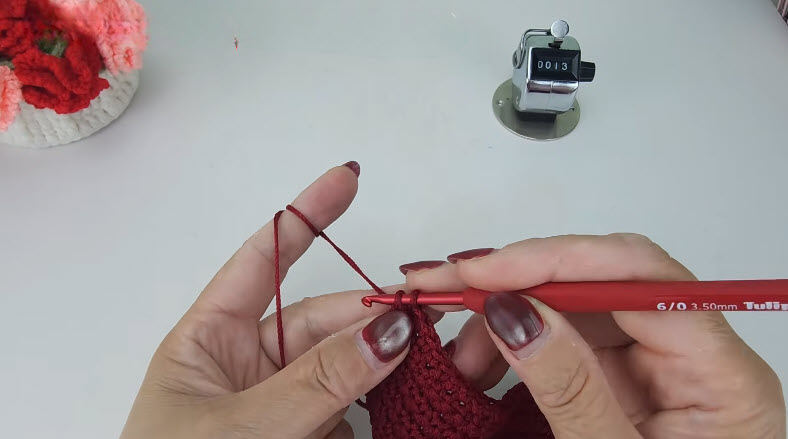
Step 7: Make the Signature Bow
The most outstanding feature of this design is the oversized ribbon bow! Use the same yarn to crochet a large rectangle. Form a narrow strip to wrap around the middle. Carefully collect the rectangle first then tie the middle strip. The finished bow should be full and rounded a bit. This is a statement bow to add to the handbag design and it’s the perfect element for the people who love creating a crochet ribbon handbag.

Step 8: Attach the Bow
Place the front of the handbag over the bow. Secure it with strong stitches. Before each stitch, be sure that it is level. The bow is centered to give a balanced and elegant look.
Step 9: Add the Closure
Select a closure of your choice. Popular options include:
- Magnetic snap
- Decorative button
- Crochet loop
- Zipper
- Ribbon tie
Secure the closure carefully, so that the handbag opens and closes easily.
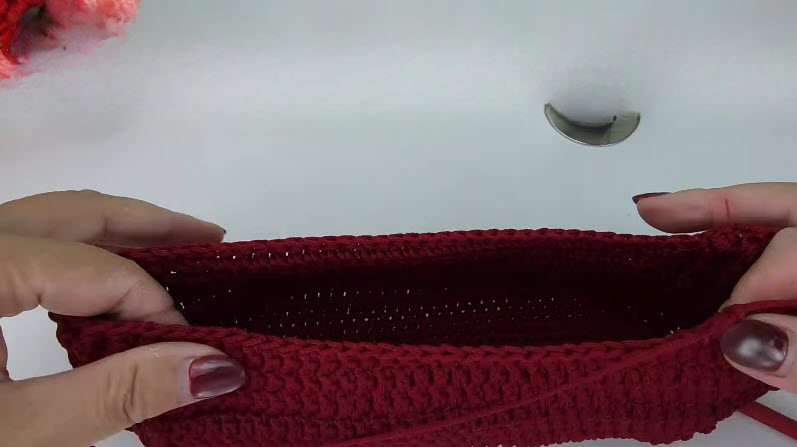
Step 10: Add Finishing Details
Complete your handbag with personal touches such as:
- Decorative buttons
- Pearl beads
- Lace edging
- Satin ribbon
- Small tassel
- Handmade label
- Floral appliqué
- Heart charm
If you’re a big fan of a small crochet bag pattern, then these finishing tips can help make each bag your very own.
Creative Color Ideas
This handbag is gorgeous in classic red, but can be modified with various colors for each season, day, and personal style. If you are looking for some gorgeous color schemes to use for your next project, here are some to look to:
- deep burgundy on cream with a cream bow.
- Dusty pink, with a white ribbon.
- A black outfit with a large red bow
- The blush pink accent is added to ivory.
- navy blue with a gold ribbon.
- beige bow with sage green color.
- pearl white ribbon with lavender
- Yellow mustard colored with a brown bow
There is nothing wrong about changing the colors of the ribbon, which can bring a whole new look to the handbag without altering the elegant design.
Creative uses for this pattern
The crochet handbag is not just for everyday wear; it’s a stylish and functional accessory that can be used in various ways. Here are some fun ideas to use your completed bag:
- Take it for a casual day-to-day handbag.
- Make it an accessory for lunch dates.
- Combine this with a spring/summer ensemble.
- Bring to a craft or local market.
- Use it when traveling for week ends.
- Carry small crochet items when travelling.
- To arrange makeup or personal items.
- When not in use, decorate with it as a shelf display.
- Pair with homemade accessories such as hats or scarves.
- Make sets of matching colorful versions for each season.
It will last long enough to be used over and over again due to its classic and timeless design.
Tips For a Professional Finish
Many finishing touches really enhance handmade handbags. Fill the bag lightly and test it for hanging before the handles are sewn on. This enables you to modify the handle position to suit your body and achieve greatest comfort.
To straighten edges and enhance shape of assembly, block each crochet panel prior to assembly. When adding a fabric lining, sew it first then add it to the interior of the handbag. A lining not only provides a nice inside finish to the bag, it also helps preserve its shape. Lastly, weave in each hair end, to guarantee that with time the handbag will be durable.
Caring for Your Crochet Handbag
With proper care, your handmade handbag will remain beautiful for years. Here are some simple care tips:
- Cool and spot clean using cool water and mild soap.
- Do not use machines to wash wherever possible.
- While still wet, reshape the bag.
- Spread it out to dry.
- Keep in a cool, dry place.
- Don’t leave heavy objects for extended periods in the interior.
With a little care, the stitches and the overall shape of the handbag can be maintained.
Why Crochet Handbags Never Go Out of Style
Handmade handbags are still gaining in popularity as they are a blend of creativity, functionality, and uniqueness. Crochet bags are unique to mass made goods. Every stitch is an expression of the maker’s time, patience and individuality. In addition, valuable crochet skills are developed through this project:
- Keeping a constant stitch length
- Crocheting straight panels
- Nicely joining large pieces
- Creating sturdy straps
- Adding decorative appliqués
- Finishing accessories professionally
Personalize Your Handbag
Among the best parts of crocheting your very own handbag is that you can create it absolutely distinctive. See if you can add some personal information like:
- Wooden buttons
- Pearl beads
- Gold chain straps
- Floral embroidery
- Lace trim
- Decorative charms
- Heart-shaped appliqués
- Monogram initials
- Small tassels
- Contrasting borders
Matching accessories such as a coin purse, key chain or phone pouch can be made using the same yarn and ribbon to finish off the set.
Each time you make a change in your handbag, it takes on a new personality but the original design remains recognizable.

Final Thoughts
The handmade handbag is a piece of art, it’s a representation of your creativity and personal style. The Crochet Red Bow Handbag Pattern with Ribbon Accent is not only fun to make but has a lovely design, as well as being functional.
This pattern is easy enough to crochet for everyone from beginner to advanced, and it’s hard to miss with the ribbon bow it includes. This design can be done either as your very first one or as an extra fashionable handbag in your handmade knaps.
Try various colors, ribbons, and embellishments to create unique bags. Whether it’s a casual date or a special event, this adorable handbag will be a favorite accessory that will be worn over and over again. All you have to do is to be patient and pay attention to the details, and you’ll soon have a beautiful handbag that looks great and is definitely handmade!