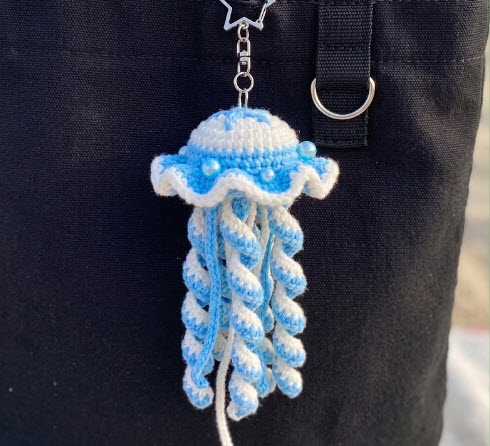
The little jellyfish hanging from a backpack or from one’s handbag is the kind of accessory that can add a bit of personal flair to an ordinary item. This little Crochet Jellyfish Keychain project is very charming and doesn’t take up too much time, with its soft tentacles and rounded body, which are inspired by the ocean.
This pattern is a fun miniature Crochet Jellyfish Keychain for crocheters wanting to make mini amigurumis. The basic shape is simple enough to work out with basic amigurumi skills, while the ocean details provide ample opportunity to experiment.
Your jellyfish could be turquoise and white for an under-sea appearance, lavender and pink for a whimsical look, or bright colors for a playful bag charm! The final product can resemble a scene straight from an underwater world if small embroidered bubbles, waves, shells or small stars are used.
The one nice thing about this project is its minimal amount of yarn usage. All those little balls that have been left in the yarn basket can be turned into colorful jellyfish without being put to use. After creating one, it’s easy to create more in various colors.
This little jellyfish is a fun project to keep close by for beginners who want something small to start with or for those who have been crocheting for a while and want something quick and easy.
Why You’ll Love This Pattern
Mini crochet is fun to do as you can see the character come alive quickly. With a few rounds a small amount of yarn can become a recognizable animal.
This jellyfish pattern is:
- Small and portable
- Easy to customize
- This makes great use of the leftover yarn.
- Ideal for use as bag charms.
- For the collection of the sea: fun!
- Simple and easy to learn (with basic skills)
- Quick enough for a weekend project
- Simple to create in various hues.
The fun part about the tentacles is that you can write them straight, wavy, curly, short and long.
This means that each jellyfish can have a different personality.
Skill Level
Time required: 10 minutes
You should be familiar with:
- Magic ring
- Chain stitch
- Single crochet
- Increase
- Decrease
- Slip stitch
- Rounds in which the players work continuously.
- Basic sewing
If you are new to amigurumi, this is a good amigurumi starter project to create a small stuffed object.
Materials You’ll Need
Prepare all supplies in advance.
Yarn
- For the jellyfish body main-color yarn is used.
- Contrasting yarn for tentacles (if using)
- Small amount of black embroidery thread
- Yarn is optional; for ocean details, use white yarn.
- Cotton yarn works well as it produces clear stitches and will catch small shapes well.
- Acrylic yarn can also be used, and will help to soften the finished charm.
Tools
- Crochet hook suitable for your yarn
- Polyester fiberfill
- Stitch marker
- Yarn needle
- Sharp scissors
- Keychain ring
- A small clasp or lobster claw.
Optional:
- Tiny beads
- Embroidery thread
- Small decorative buttons
- Ribbon
Finished Size
You can expect to make a jellyfish approximately 3-4 inches in size, depending on the size of your yarn and hook.
To make it smaller, use a small hook and use lightweight yarn.
To make a larger charm or plump, use heavier yarn and a heavier hook.
Remember, an economical keychain is one that can be held in the hand without it being too heavy.
Pattern Notes
Prior to starting, make sure that the stitches are not too loose so that the stuffing does not show through.
Stitch marker used at the start of each round.
Count your stitches regularly. The project is small-size and can affect shape with just a single missed stitch.
Do not over feed the body. The jellyfish should be firm, but not too hard.
How to Crochet the Jellyfish Keychain
It is beneficial to know the construction before starting the crochet steps. The body is rounded and the bottom is small; the jellyfish has a few tentacles hanging down and simple facial features. After these are completed, you’ll be left with the keychain hardware and ocean-themed decorations.

Step 1: Crochet the Jellyfish Body
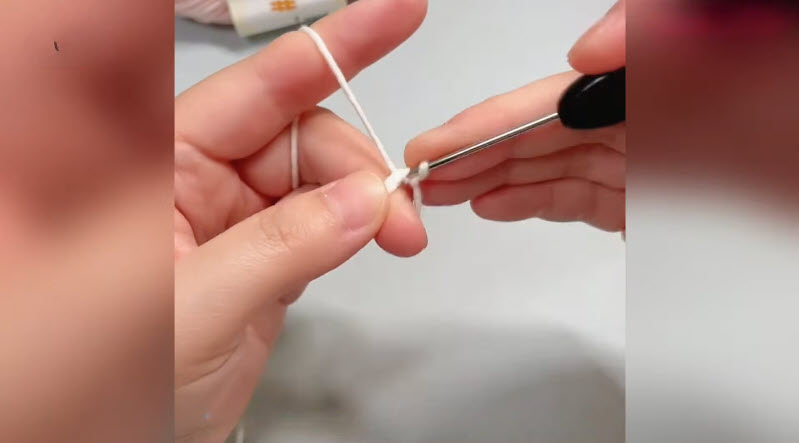
Create a magic ring with the main thread.
Make 6 single crochets into the ring.
Reclose the ring.
The next round, add more stitches.
Make even increases in each round thereafter.
The piece should slowly make a rounded circle.
After the circle is the desired width, simply work single crochet stitches without increasing.
The dome of the jellyfish will start to be formed.
Continue to review the shape along the way.
Step 2: Shape the Dome
Keep doing even rounds until sufficient height is achieved in the body.
The top should remain rounded, with the bottom slightly curved inwards.
If the shape of the body appears too flat, add another round to it.
If it’s too tall, cut off a ball and make sure the proportions are correct again.
It’s OK if things are slightly different.
Step 3: Add the Stuffing
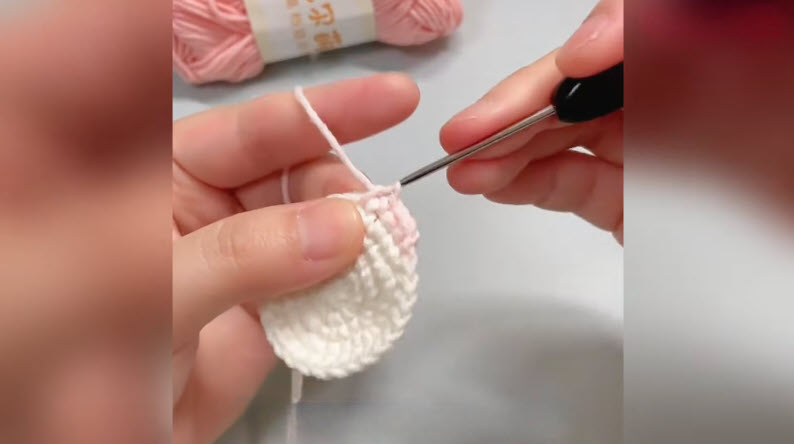
Start stuffing with polyester fiberfill when the body has reached sufficient height.
Instead, use small pieces rather than pushing in one large piece.
Divide stuffing evenly into sides.
Don’t over tightly stuff it.
The objective is to make a soft dome that is not hard and has no holes in it.
Step 4: Close the Body
Begin decreasing rounds.
The opening is surrounded by a uniform decrease in work.
If you see empty spaces, add in some extra stuffing.
Repeat the process, gradually making the hole smaller.
Remove the yarn off and stitch the remaining ones back together with the yarn needle.
Gradually pull to achieve a good finish.
Step 5: Crochet the Tentacles.
It’s time to check out the most iconic part.
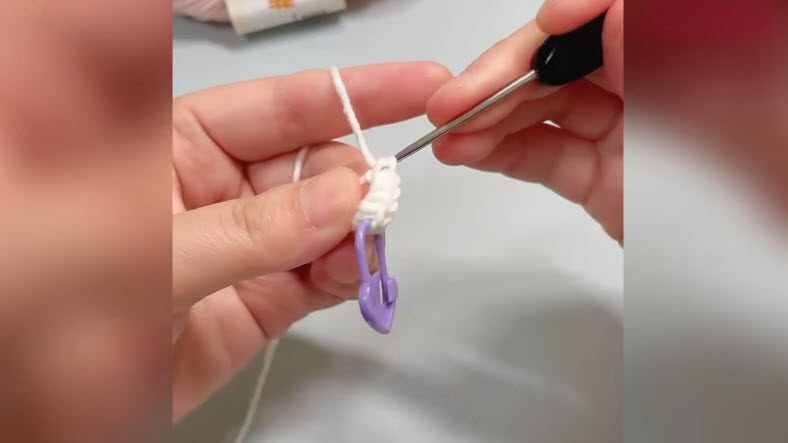
Make multiple chains with your contrasting yarn.
The length of chains will be according to the number of tentacles you need.
To get a fuller appearance, use 6 to 8.
If it’s a simpler design, 4-6 can be sufficient.
Create smaller and larger tentacles.
This is for added movement.
Step 6: Give the Tentacles Ocean-Like Movement
A simple way is to make a couple of single crochet stitches into a chain. The additional stitches will cause the strand to naturally curl.
Another option is to use slip stitches for a thinner, more delicate tentacle.
Experiment and choose the one texture you like best.
Keep the tentacles fairly thin to make a mini crochet jellyfish, otherwise it will become too overpowering.
Step 7: Secure the Tentacles
Wrap the tentacles in the lower part of the body.
Space them out as evenly as possible.
Put some longer tentacles in the middle and place some shorter ones on the sides.
Sew them securely.
Make sure the tentacles are the way you want them to go before you tie the stitches all the way around the jellyfish.

Step 8: Add the Face
Make two little eyes with black embroidery thread.
Spread them out in front of the body.
Sneak a very small smile below.
The expression can be happy, sleepy, surprised, or even a bit mischievous.
A little pink yarn can be used to create cheeks.
Embroidered features are better than plastic safety eyes for a kid-friendly option.

Adding Ocean Details
It’s here the project takes on more than a jellyfish.
Embroider small bubbles with embroidery thread around the body (white or contrasting).
Circles can represent bubbles in the water, particularly when they are small.
Another embroidery that you can do is:
- Tiny stars
- Waves
- Shell shapes
- Small dots
- Seaweed
- Bubbles
- Little fish
Try to keep the details to a minimum. Few strategically positioned accents, typically, will be better on such a small project.
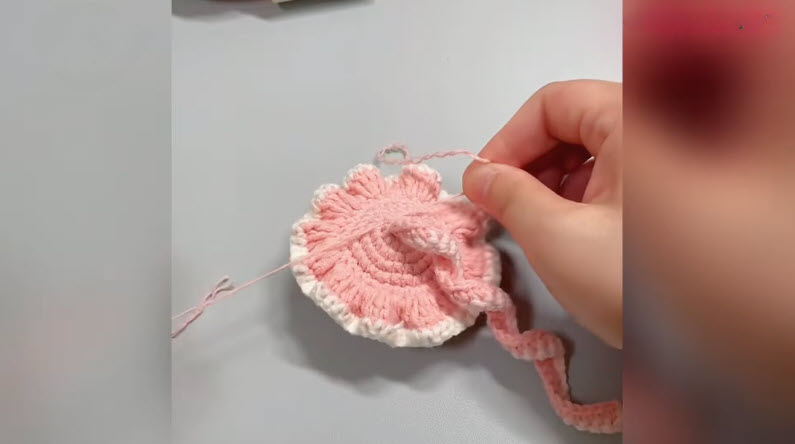
Create a Tiny Ocean Theme
For multiple jellyfish, assign each an actual, underwater character.
Tentacles could be blue and bubbles white.
Another can incorporate blue into the design.
A third could be a green and turquoise.
Just make a small ocean collection by adding mini crochet fish, shells, starfish, seaweed, etc.
This is particularly enjoyable for kids that like ocean crafts.
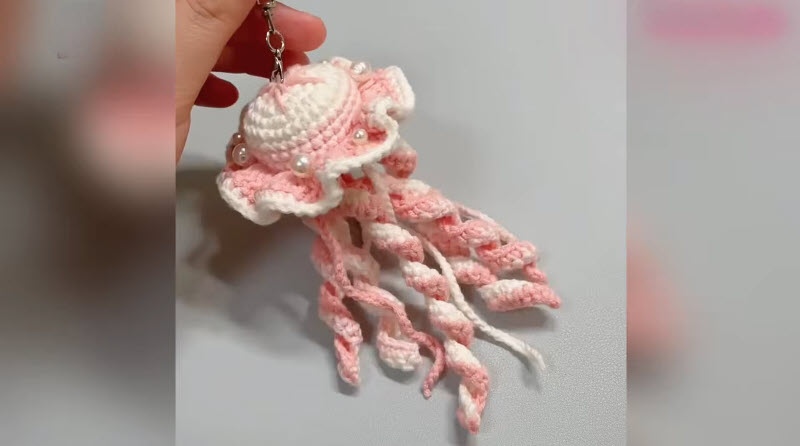
Click and attach the Keychain Hardware
When the jellyfish is complete, make a solid loop at the top.
It is possible to crochet a small chain and attach it securely to the body.
Put on the metal key chain ring in the loop.
Add more support by passing yarn through the connection a couple of times.
Pull on the ring before putting it in a bag.
Reenforce the loop again if it moves.
This is significant because this small step will allow for cyclic motion in the charm when attached to a backpack or handbag.
Creative Color Ideas
The sea is never ending inspiration.
Try these combinations:
- Turquoise and white
- Aqua and lavender
- Navy and pale blue
- Mint and cream
- Coral and peach
- Berries are sea green/yellow.
- Purple and pink
- White and rainbow
- Beautifully dyed a deep blue and silver.
- The tentacles may be made of variegated yarn too.
The strands can appear as flowing under water ribbons if they are a gradual color change.
Ways to use this pattern
You can leave the jellyfish on a keyring or attach it to a locket.
Try using it as:
- backpack charm
- handbag decoration
- zipper pull
- case that attaches to a pencil case.
- travel bag charm
- decoration for a project bag using crochet.
- The shelf in the nursery is a simple accent.
- It was a part of an ocean theme display.
Pro Tip
Make the tentacles in slightly different lengths and textures. There is a slight variation in the jellyfish, making it appear softer and more natural rather than overly symmetrical.

Take care of your Jellyfish key chain!
A key chain is something that you carry with you, and it will get dusty.
- Gently brush or use a lint roller to clear surface dirt.
- If it is a small stain, dab with cool water and mild soap.
- Do not soak the whole charm unless it is said to do so in the yarn label.
- Do not twist/cringle the crochet piece.
- Dry meticulously with a towel and remove moisture prior to reattaching to bag.
- Check the metal ring occasionally to make sure it hasn’t loosened.
Personalization Ideas
After creating the basic jellyfish, you can try out various personalities.
For a cute character, add very small, embroidered eyelashes.
For a whimsical design, add a little bow.
Create sleepy eyes for a soothing appearance.
Consider using a “glow” yarn when making a fantasy jellyfish.
A rainbow tentacle version even comes with a pastel body, and it can be a fun summer accessory!
Black, purple, and orange colors are for Halloween.
In the winter look for white, pale blue and silver.
The very same basic construction can produce totally different characters.
Final Thoughts
Little crochet patterns are usually favourites. This handmade Crochet Jellyfish Keychain is both easy to round and fun. Rounded-up, it’s easy to round and has playful tentacles and tiny ocean elements to make it a fun accessory for anyone who loves handmade charms.
The project is also good practice in learning amigurumi fundamentals. You will be working in rounds, forming a stuffed body, making decorative small pieces, and seeing how easy embroidery can be to make an otherwise plain project.
Don’t be afraid to be creative. Add some tentacles, colour it or draw the bubbles or make an entire underwater family. After knowing the basic construction, you can create any number of jellyfish.
You can attach it to your backpack, use it as a zipper pull or wear it with other ocean-themed crochet pieces and it will undoubtedly bring a bit of underwater charm wherever it goes.